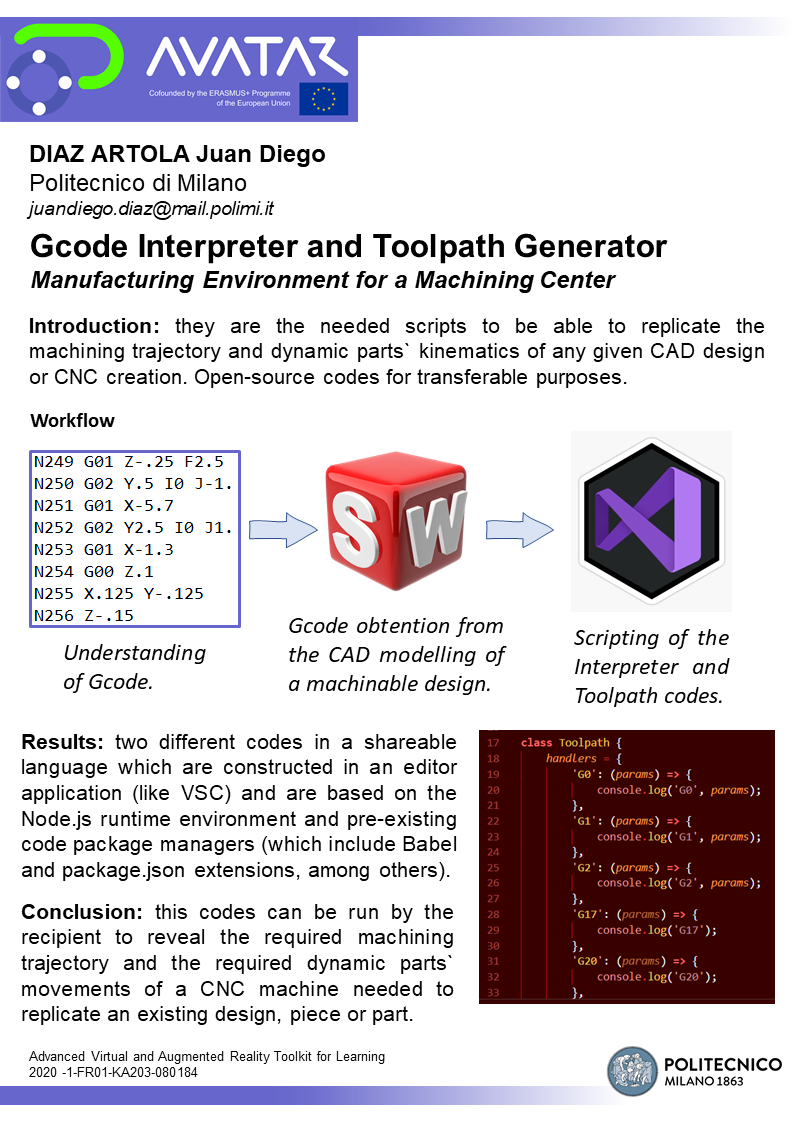
Gcode Interpreter and Toolpath Generator
This document is intended to describe the performed activities in order to properly write down the scripts that correspond to a Gcode Interpreter and a Gcode Toolpath Generator. The general aim of this research work is to ilustrate in detail the process that was followed to achieve the mentioned codes, so that the reader can learn how to construct copies of them and apply them on machining centers, if wanted.
The Gcode Interpreter is a set of code lines that are employed to replicate the tool trajectory of a machining process. This tool trajectory is based on the Gcode operating commands and the X, Y and Z axis. The Gcode Toolpath Generator is a set of code lines that are employed to define the movements of the dynamic parts of the employed CNC machine in order to match and allow the tool trajectory. These kinematics are also based on the Gcode commands and the X, Y and Z axis; but on the same time they depend on the different types of movementes that the different parts of the machine can perform to fullfill their job, like arc-like or straight-line transportations.
The two mentioned scripts are constructed with the final objective of being able to duplicate an already existing CAD design or CNC creation on another CNC machine or in a machining simulation software. These code strings have an open-source nature for transferable and re-usable purposes.
Poster
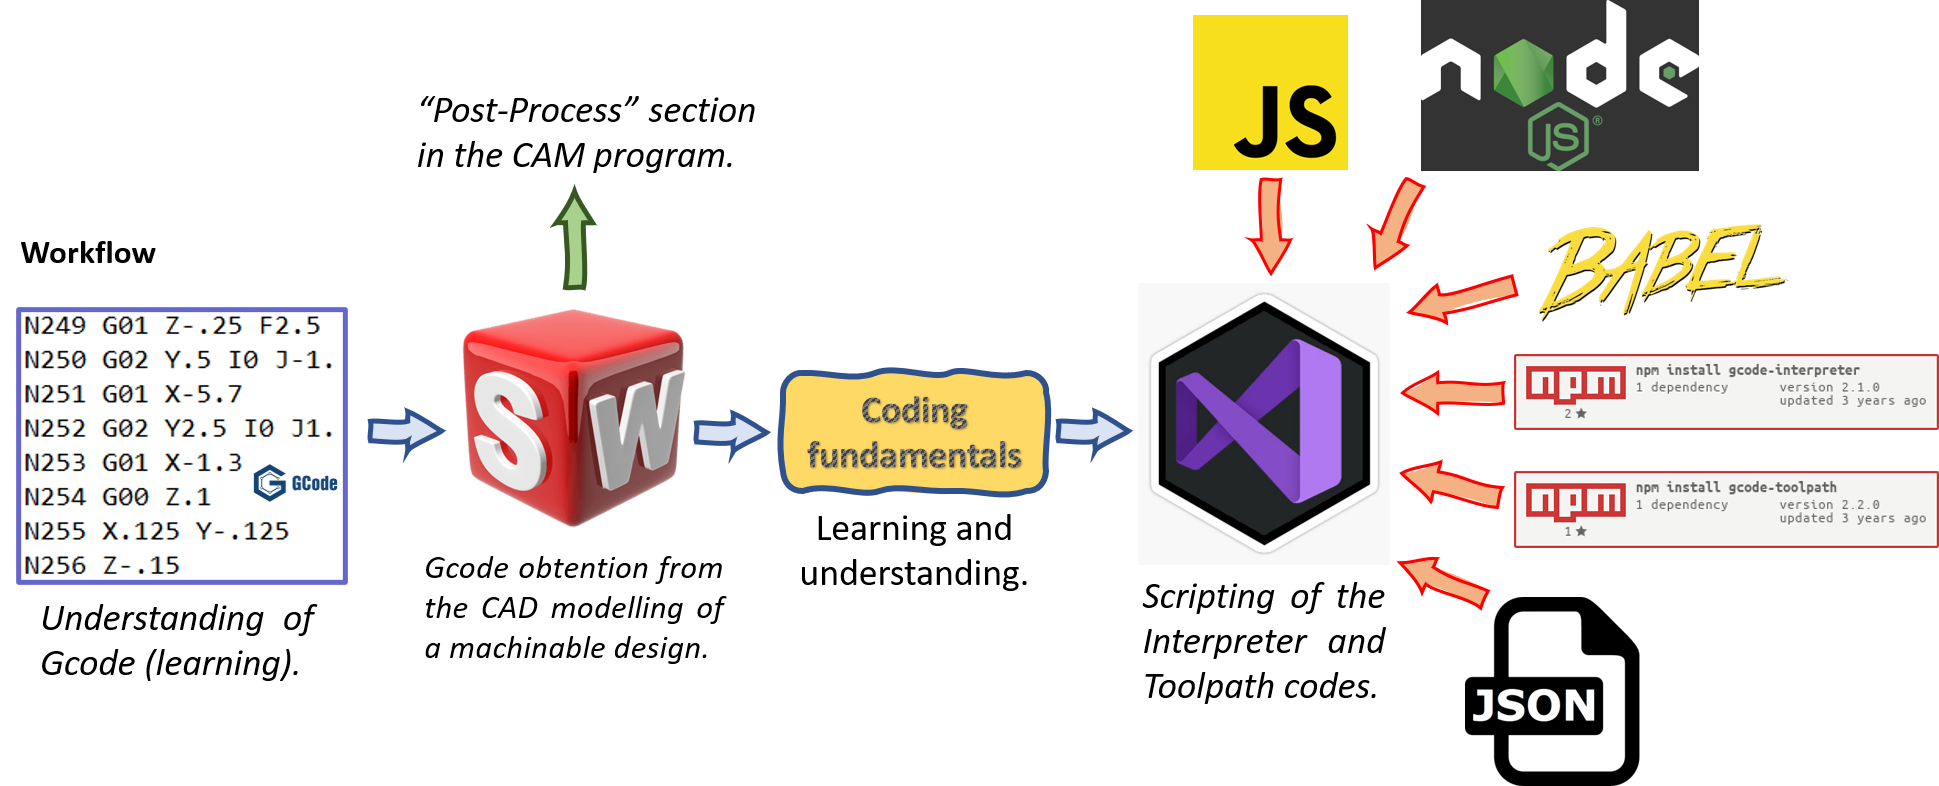
Workflow development
| INPUT: Tack to program using Gcode |  | OUTPUT: Gcode |
Workflow building-blocks
| Acitivities | Overview |
|---|---|
| A1 Gcode Learning | • Description: The first step to be able to correctly understand and re-use the produced codes is to learn what Gcode is. It is important that the student of this workflow fully comprehends the purposes of Gcode, its different operating commands, the X, Y and Z axis dependance and how this code can be obtained through different methods like: self-designing an own machinable part in a CAD software, requesting the Gcode of an existing design in a CAD software, utilizing a raw Gcode from a given source, among other resources to obtain it. In the following image, the main Gcode commands can be appreciated: 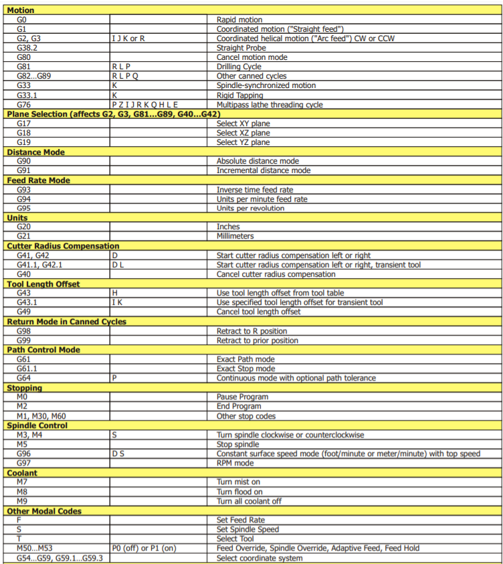 • Input: CAD Software, Gcode documentation • Output: Comprehensive understanding of Gcode-Ability to obtain Gcode through various methods • Control: Gcode understanding • Resource: CAD software, Gcode learning materials, existing Gcode sources |
| A2 Gcode Generation | • Description: The second step is one of the main ones: to generate or obtain a Gcode that will serve as the main input of the Gcode Interpreter and Toolpath Generator. This must be done - with a CAD software that issues the corresponding Gcode after designing a machinable piece or part, or through the direct reception of it in its raw state (simple text format). It is important to mention that if the Gcode is coming from a different language than javascript or inside an existing script, it must be cleaned from it to be able to use it in its “raw” or simple text state. The Gcode Interpreter and the Toolpath Generator scripts will be able to load it directly from writen lines inside the same interpreter code, from a text file or through other available modalities, but always in text format. • Input: CAD software or raw Gcode • Output: Gcode in simple text format, ready for Gcode Interpreter and Toolpath Generator • Control: Gcode Interpreter and Toolpath Generator Gcode importer • Resource: CAD software Gcode Interpreter and Toolpath Generator |
| A3 Coding Fundamentals | • Description: The third step corresponds to the second great learning section of this workflow. Javascript coding must be learned and understood, at least in a basic sense, in order to properly comprehend the resulting interpreter and toolpath code strings, and specially to be able to modify them if required. The editor program that has been employed for this investigation is Visual Studio Code, so it would be better to work in it as well. The interaction between specific coding concepts must also be learned in order to correctly work with the obtained codes of this research. The source code agents that will collaborate with each other are mainly: - Visual Studio Code or any other popular and updated editor - Javascript language - Node.js runtime environment - Node package managers (NPM) - Babel extension - package.json extension - Text extensions (like .nc) - Among other extensions - Terminal, Output, Debugging and Problems interfaces of the editor Important is to be noted - in order to help shorten the learning process - that Node package managers already bring the different needed extensions within them. So, when the NPM gets installed, the Babel and .json extensions will come along with them. It will be best if verification that the extensions are already installed is performed. • Input: Javascript coding concepts • Output: Ability to work with Javascripts • Control: Javascript (Visual Studio Code, Node.js, Node package managers (NPM), Babel extension, package.jso) understanding • Resource: Visual Studio Code, Javascript language, Node.js runtime environment, Node package managers (NPM) |
| A4 Coding | • Description: This is the core step of all the project. This is where the learned skills take action with the objective of developing the interpreter and toolpath strings of code. This step will be divided in two explanating approaches: 1) The first one will detail how this research was carried on to achieve the now existing interpreter and toolpath scripts. 2) The second one will show how the mentioned source code can now be directly employed to run a gcode input that will automatically return its interpreter and toolpath results. FIRST APPROACH (A): This step is detailed in sub-steps: 1: Open a Code Editor Download or open a code editor like Visual Studio Code, Kite, Atom or any code editor that works well with the js language. Tutorials on youtube if needed. 2: Install .js (if required) 3: Download and install Node.js This step requires the application to be installed as a path of your operative system. Tutorials on youtube. 4: Install the Node package managers in the Terminal interface There are two Node package managers: - The Gcode Interpreter NPM - The Toolpath Generator NPM To install them, the following commands must be entered at the Terminal interface: - “npm install –save gcode-interpreter” - “npm install –save gcode-toolpath” When these package managers are installed, the related and needed extensions will automatically appear on the left side of the screen in the Explorer section, where the extensions or “coding agents” are listed. This section must be reviewed in order to fully understand the relation between the extensions. In the Explorer window, the new .js files - where the interpreter and toolpath codes will be writen - must be created. These files will consume information from the .nc (text) files as well as from other extensions appearing in the Explorer window. On the second approach that follows, images and files links will illustrate this explanation. It is important to communicate that the two NPMs mentioned above possess a git repository on github.com on the following adresses: - gcode-interpreter - gcode-toolpath In the mentioned repositories, the lines of code that have to be employed to run the interpreter and toolpath commands are expressed. These were the code lines that served as a source for the construction of the scripts. Nevertheless, when developing this project, it was found that they are not entirely precise and had to be slightly modified in order to achieve functional working files. • Input: Code editor and Node.js. Gcode Interpreter NPM and Toolpath Generator NPM • Output: Developed interpreter and toolpath strings of code, ready to run a Gcode input that automatically returns its interpreter and toolpath results • Control: Installation • Resource: Code editor Javascript language, Node.js runtime environment, Node package managers (Gcode Interpreter NPM and Toolpath Generator NPM), Terminal interface, github repositories of the NPMs. |
Results
SECOND APPROACH (B):
The results of this project can be expressed as the second approach that was mentioned in the 4th step of the workflow. These results correspond to the final working interpreter and toolpath codes. These final scripts are now employable to run a Gcode that is loaded from a file or directly writen in the code itself. In the following lines, images and links to files will illustrate the results:
MACHINABLE DESIGN CREATED IN SOLIDWORKS
| Stage | SolidWorks |
|---|---|
| Sketching | 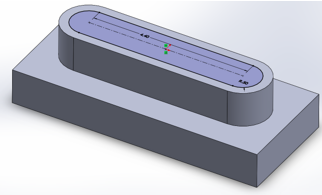 |
| Stock view | 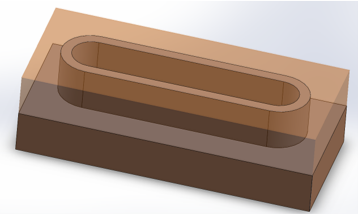 |
| Toolpath projection | 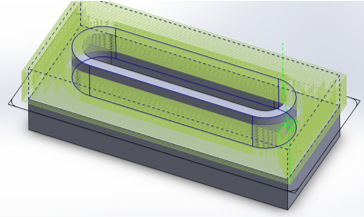 |
| Simulation | 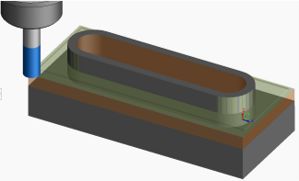 |
| Product | 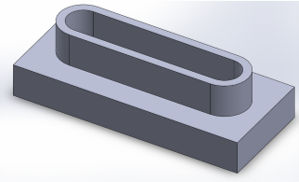 |
Resulting Gcode fragment:

Conclusion
This research has allowed to polish a very useful tool to be able to transfer in an easy way the parameters of any machinable piece or part, so that anyone can replicate it anywhere else. To work with it, it is imperial to completely understand what Gcode comprehends, to possess clear manufacturing and machining concepts and also to have basic coding knowledge.
Recomendations
It is better to understand the interrelation between Babel and .js and how they imply a special language that allows different versions of different browsers from different times to be able to read the resulting scripts of this research.
Avatar for me
Avatar has been an amazing experience for me because it has represented a breakthrough of knowledge on a subject that has always been of my interest, which is learning how to code. It has also been very special because it has taught me further machining concepts in terms of what Gcode stands for and industrial engineering is truly one of my passions, so I am very grateful for knowing now more concepts about it.