Animation of Machine Center in Virtual Space
The main purpose of this document is to shed light and provide information on how to define motion of some of the dynamic parts of the Mikron HPM450 machine integrated with the Pallet Assembly. A defined process that will be elaborated further in this document is followed to achieve the output. The simulation achieved is performed easily in a completely web-based setup
Poster
Workflow development
| INPUT: 3D model placed in VEB.js | 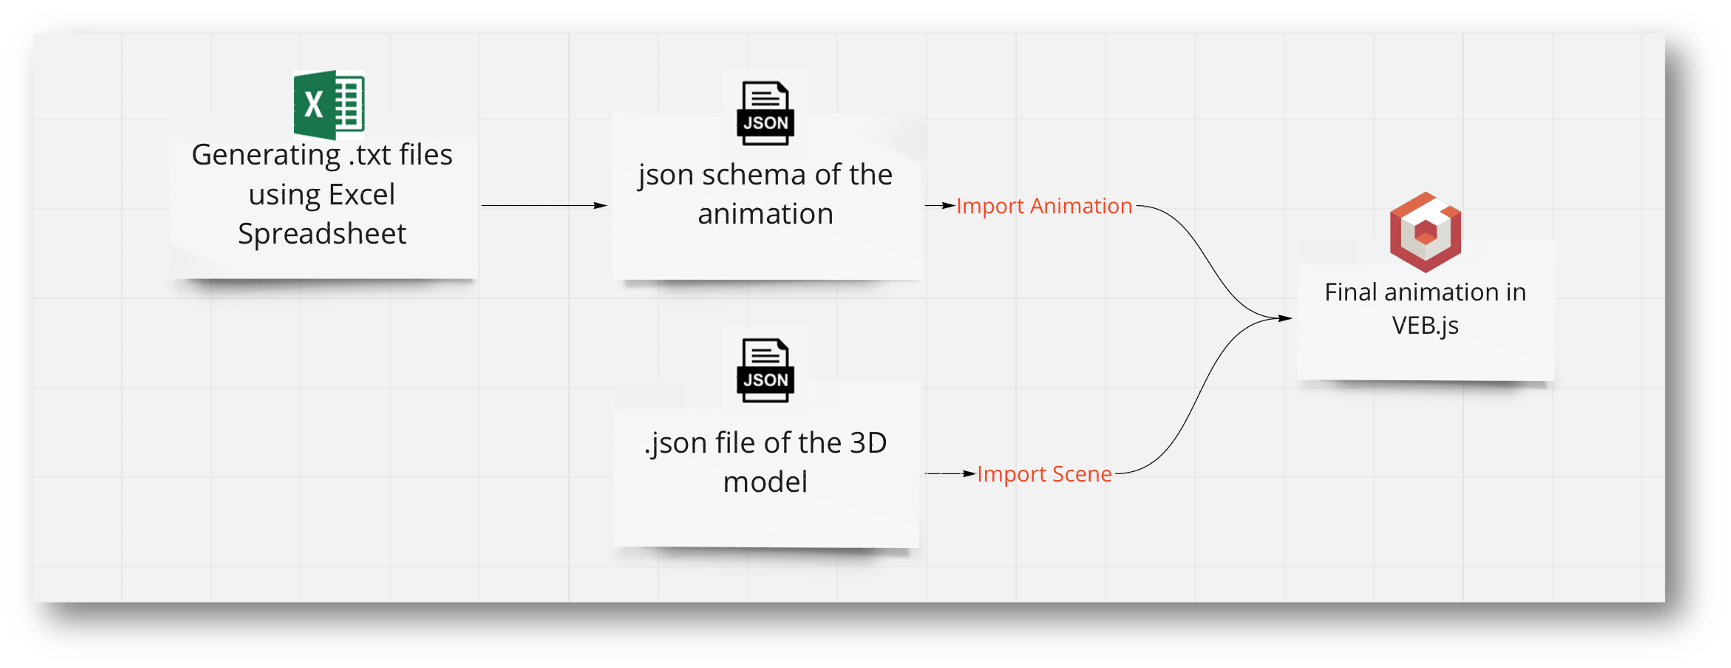 | OUTPUT: JSON schema of the animation sequence to import in VEB.js |
Workflow building-blocks
| Acitivities | Overview |
|---|---|
| A1 JSON Schema into VEB.js | • Description: It is the JSON schema of the machine center integrated with the pallet assembly. This 3D model can be placed in the virtual space by importing this JSON schema in VEB.js using import scene option. 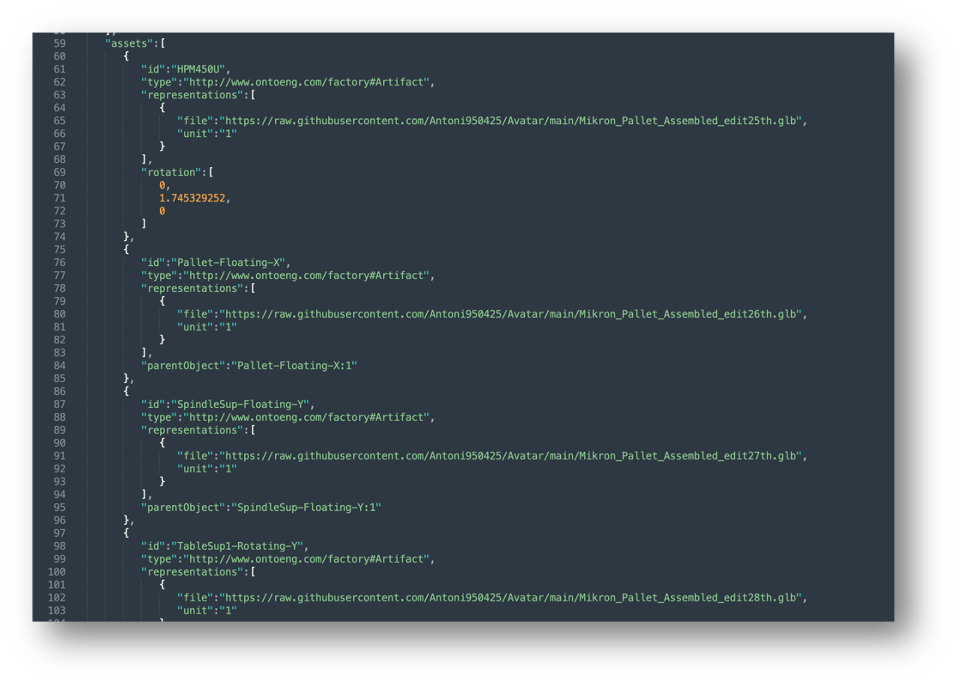 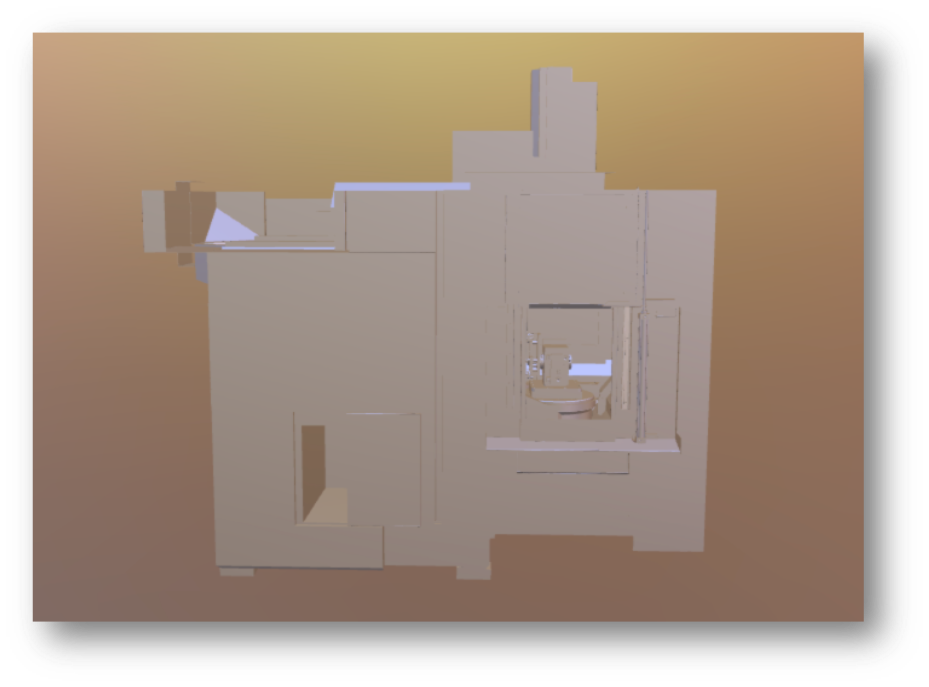 • Input: JSON schema • Output: A 3D model placed in VEB.js • Control: Import scene option in VEB.js to handle the importation of the JSON schema • Resource: VEB.js and the JSON schema |
| A2 JSON Schema of the Animation Sequence | • Description: It is the JSON schema of the animation which requires some prerequisite steps. First we have to define the motion of the dynamic parts of the 3D model. This can be done by identifying the type of motion each dynamic part performs. This motion can be defined in a .txt file format. An excel spreadsheet has been developed in which only the frames, frames-per-second, intial position of the part and the final position of the part have to be provided as inputs. This spreadsheet will provide you with the ouput animation sequence. 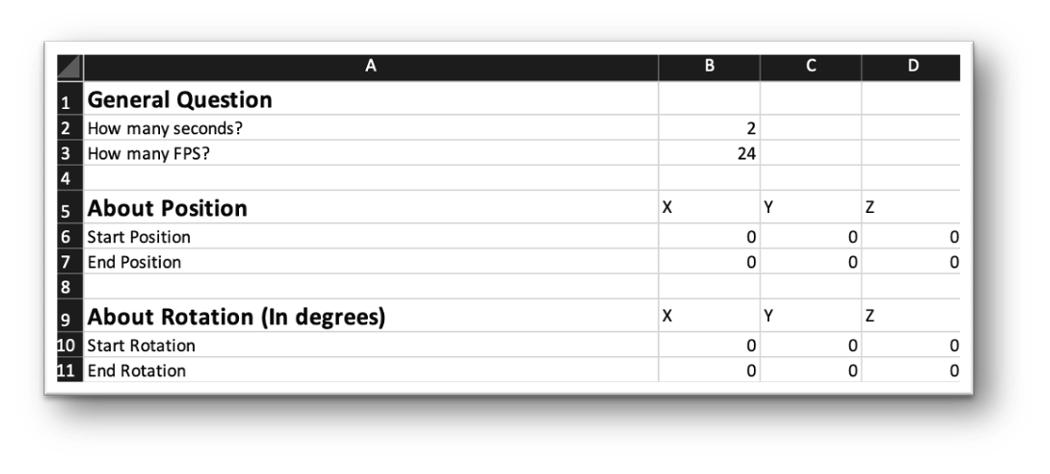 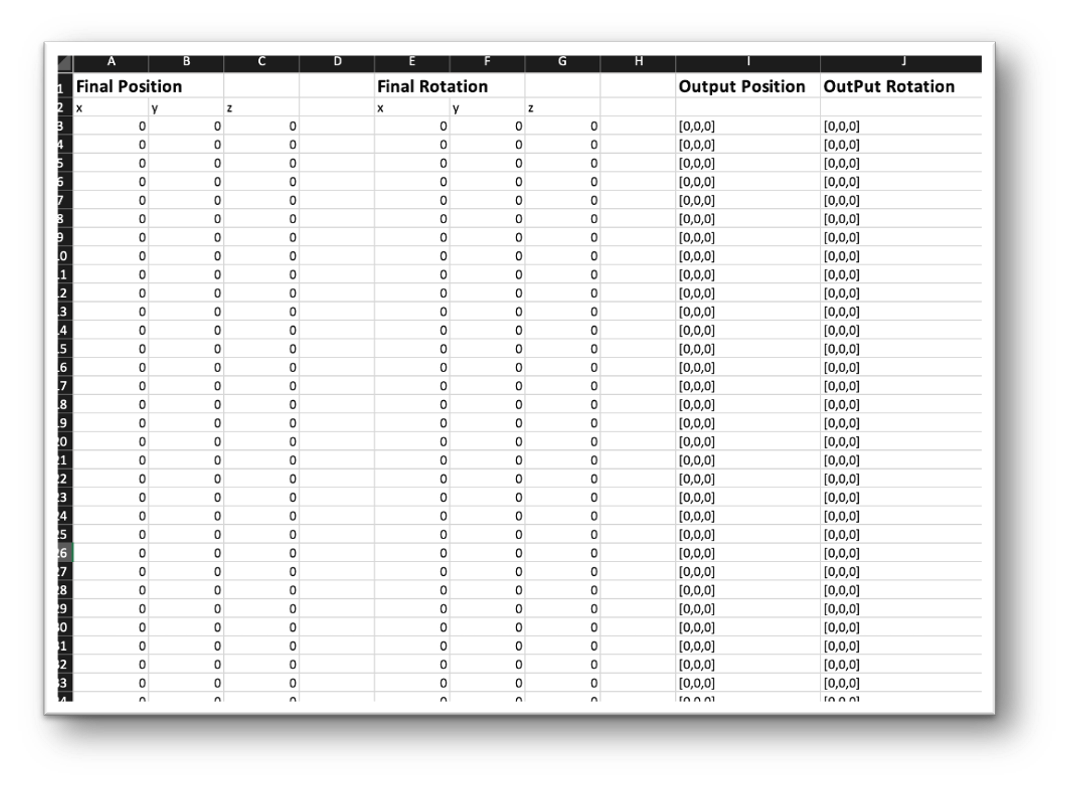 The .txt file with the defined motion sequence is the input for the JSON schema for animation. The motion is defined for three dynamic parts in this case, with two parts rotating and the third part performing a linear motion. Here it can be observed that the values are all same, this is in fact due to the type animation that has been used. It is an additive animation sequence, in which the animation is incremental with respect to the current position, or in other words each for frame the value is added to the value of the previous frame. In the image below, it can be observed that the first dynamic part is rotating along the Y-axis and the degree of motion is 0 - negative 90 degrees. The second dynamic part has the range of motion defined from 0 - 180 degrees along the Y-axis. The third dynamic part performs a linear motion and moves 360mm along the Y-axis in negative direction or towards the pallet asembly. The .txt file with the defined motion sequence is the input for the JSON schema for animation. The motion is defined for three dynamic parts in this case, with two parts rotating and the third part performing a linear motion. Here it can be observed that the values are all same, this is in fact due to the type animation that has been used. It is an additive animation sequence, in which the animation is incremental with respect to the current position, or in other words each for frame the value is added to the value of the previous frame. In the image below, it can be observed that the first dynamic part is rotating along the Y-axis and the degree of motion is 0 - negative 90 degrees. The second dynamic part has the range of motion defined from 0 - 180 degrees along the Y-axis. The third dynamic part performs a linear motion and moves 360mm along the Y-axis in negative direction or towards the pallet asembly. 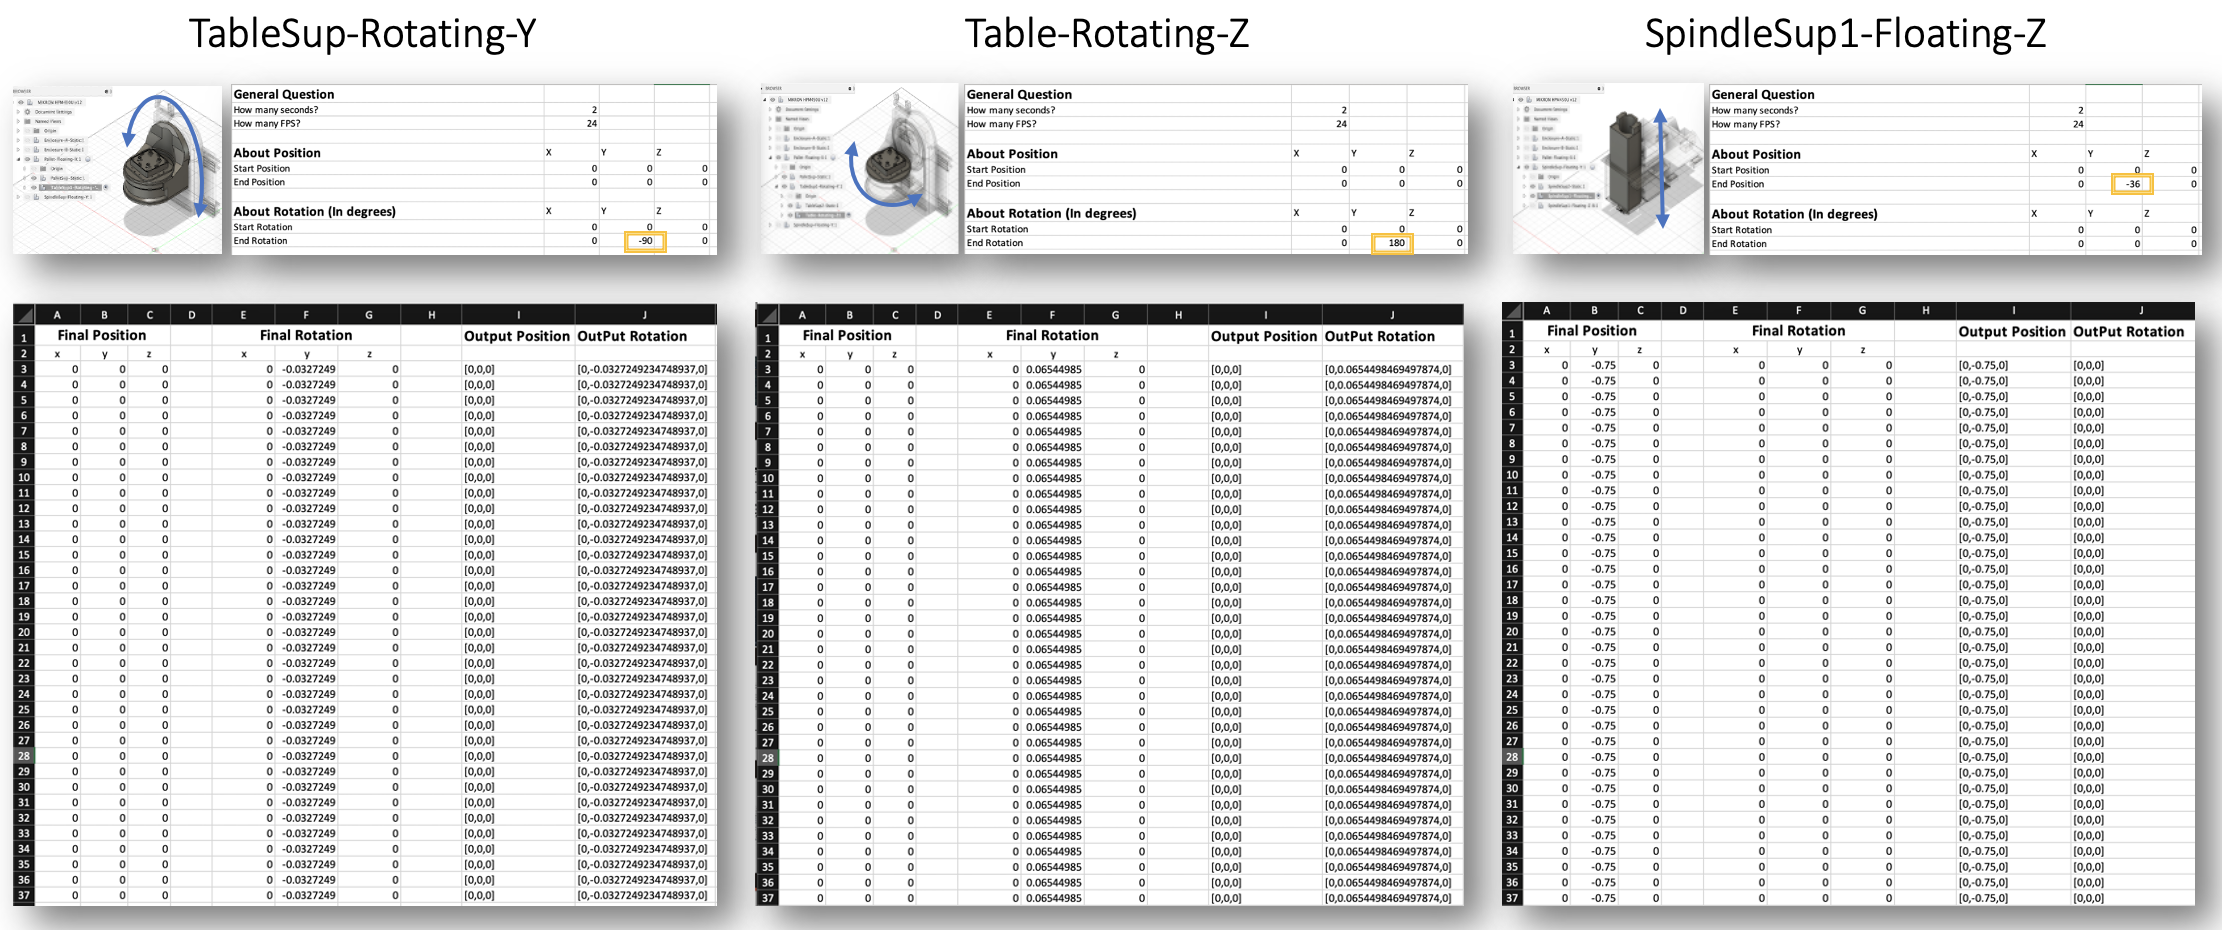 After defining the motion sequence, JSON schema of this sequence has to be developed. Fundamental infromation regarding the animation can be found here. Image below shows a part of the JSON schema. After defining the motion sequence, JSON schema of this sequence has to be developed. Fundamental infromation regarding the animation can be found here. Image below shows a part of the JSON schema. 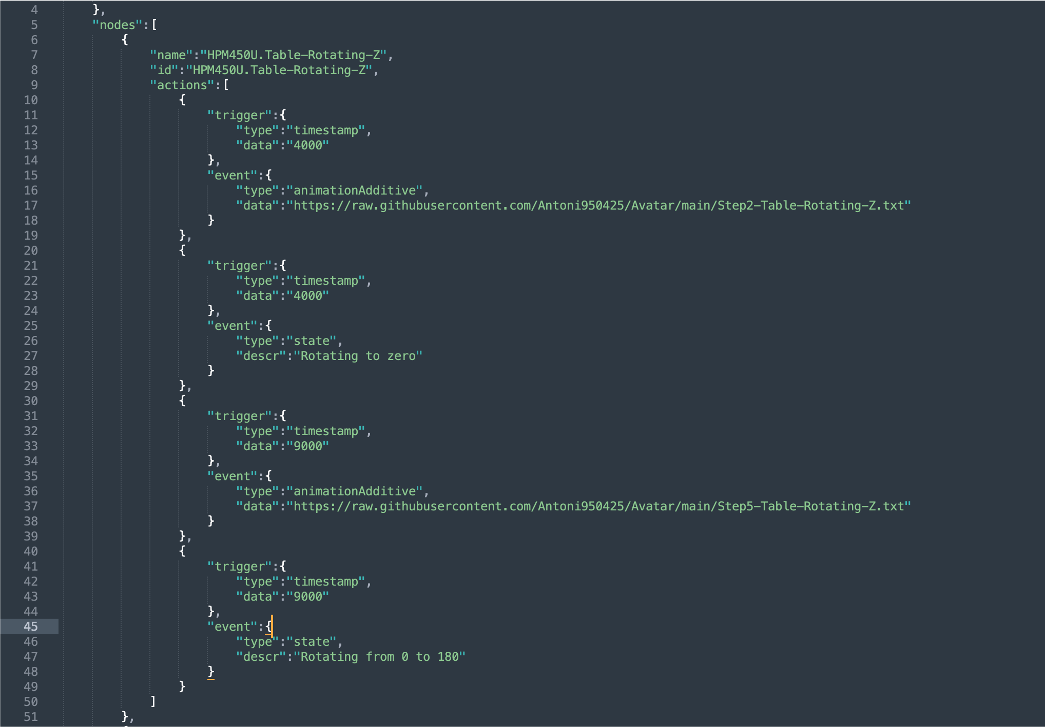 The second input is ready to be imported in the virtual space. Once 3D model has been imported, the JSON schema of the animation can be uploaded using the import animation option. Once both the schemas have been uploaded just play the animation. Examples of assets and animations can be found here. The second input is ready to be imported in the virtual space. Once 3D model has been imported, the JSON schema of the animation can be uploaded using the import animation option. Once both the schemas have been uploaded just play the animation. Examples of assets and animations can be found here. • Input: .txt file with the defined motion sequence for the dynamic parts of the 3D model • Output: JSON schema of the animation sequence to import in VEB.js • Control: The motion sequence of the dynamic parts in the 3D model • Resource: Excel for creating the .txt file with the motion sequenc |
Results
The resultant video shows us exactly how the machine center, by being in the virtual space, will perform in real world. A video of the above mentioned motions has been provided. Although this is not the final task, the ouput obtained here can be used as input for further tasks.
Conclusion
The input of this task was actually the ouput of previous task of generating the 3D model in GLTF format. And the excel spreadsheet develped has been quite handy as instead of defining the motion for each frame, this spreadsheet just takes the input position and the output position and provides us with the motion sequence ready to be save in .txt format. The JSON schema provides the freedom to define the animation accordingly. The virtual reality is a graphic interface that has broader uses. This workflow can be taken to next step by coonecting a VR headset and interacting with the setup directly as the user himself will experince the virtual space first hand and he/she will be able to interact with the setup and extract the data.
Avatar for me
Was a journey filled with knowledge and experience. The knowledge of XR technologies and how they are building the future of human kind. The experience of being a part of such a diverse group and able to connect with colleagues and professors with vast expertise. I was more involved in the machining use case and worked from the start, developing the 3D models so that they are compatible with the future tasks such as animating the model. During this process, I was exposed to various tools and softwares, some I had forehand knowledge about, while others I had to learn from the scratch. The lectures and the tutorials have helped a lot especially while working with theses completely new tools. And with the tutorials of the tasks performed by current students I hope the future students will find this project equally enjoyable and knowledgeable.